Serial devices in devcontainers
When using devcontainers it becomes difficult to interact with physical devices attached to the host machine and outside of the container. Especially on Windows devices where your devcontainers are running on a Linux operating system, not Windows. Modern container runtimes use Windows Subsystem for Linux 2 (WSL2) to leverage native Linux support inside containers, so there is a connection between the two operating systems. You can still use serial UART devices inside of your devcontainers with some work. You will see how we can use a tool called usbipd-win to bridge the host machines USB serial devices to WSL2 and consequently also containers and devcontainer in particular.
This allows you to use your USB serial UART device during development, for example to upload a BLL object file to the Lynx or flash a cartridge.
Connecting USB devices to a devcontainer
For Atari Lynx development you are likely to use an USB based adapter for UART communication between your Atari Lynx and development machine. Our example for now is a FTDI USB serial adapter, that is connect to a ComLynx cable and utilizes serial communication to the Lynx. Typically, this is for uploading BLL based programs to the Lynx, or ComLynx inspection for multiplayer game development. Serial devices are presented as COM ports on Windows or /dev/tty* for Linux in most cases.
Working with development containers on a Windows OS brings a challenge if you want to use such USB devices for COM ports. By default USB devices and their COM ports are not accessible from a container, due to the missing native support. It is possible to bridge between the Windows operation system and the Linux based container OS by using additional tooling.
The USB/IP open source project has a tool usbipd-win that is capable of connecting USB devices to a linux distribution running via Windows Subsystem for Linux (WSL). Your USB devices can include serial and UART devices, such as adapter based on FTDI, Prolific and Silicon Labs chipsets, that you might use for ComLynx and serial connections to the Lynx from your developer machine. The tool leverages the USB/IP Protocol that has been part of Linux kernels since 2009 to forward USB traffic from Windows to Linux over a virtual network interface.
The usbipd-win tool has a command-line interface (CLI) to discover any USB devices that are attached to your physical machine, and attach and bind these to WSL. In effect it allows your USB device to be connected and exposed to any Linux container running via WSL on Windows. Upon connection the original USB device is reconfigured as an USBIP device. The new device creates an IP address to allow connectivity to the container over TCP/IP.
Installing uspipd-win on Windows
The devcontainers you are using have a Linux kernel version that is higher than the minimum required version of 5.10.60..
There are two ways to setup uspipd on your Windows system:
- Download and install the latest release from the project website: https://github.com/dorssel/usbipd-win You can find a Windows MSI installer package.
-
Use the
wingetWindows Package Manager to download and install the latest release.winget install --interactive --exact -- dorssel.usbipd-win
Attaching a USB device
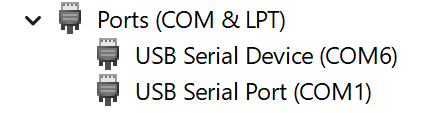
Looking at your devices with Device Manager in Windows you should be able to locate the USB device you want to connect.

This particular FTDI device presents itself as a COM port on Windows, USB Serial Port (COM1) in the picture below.
With upbipd-win installed you can check the available USB devices on your machine by running uspipd list in a terminal window:
c:\> usbipd list
Connected:
BUSID  VID:PID    DEVICE                                                        STATE
4-2    0403:6001  USB Serial Converter                                          Not shared
4-9    045e:0990  Surface Camera Front, Surface IR Camera Front                 Not shared
4-10   8087:0026  Intel(R) Wireless Bluetooth(R)                                Not shared

Persisted:
GUID                                  DEVICE
Find the USB device you want to connect to your container. In the output above this would be the line that reads 4-2 0403:6001 USB Serial Converter, referring to the FTDI USB serial adapter.
If you are having trouble finding your device based on the description, you can try disconnecting it and running the list command again. Your device should no longer be present in the list. Alternatively, you can run usbipd list --usbids which will list the device descriptions as found in a Linux database instead of the original description from the device drivers.
c:\> usbipd list --usbids
Connected:
BUSID  VID:PID    DEVICE                                                        STATE
4-2    0403:6001  Future Technology Devices International, Ltd, FT232 Seria...  Not shared
4-9    045e:0990  Microsoft Corp., Unknown device                               Not shared
4-10   8087:0026  Intel Corp., AX201 Bluetooth                                  Not shared
Note the bus identifier 4-2 and VID:PID value of 0403:6001, which we will use for the next set of commands. Make sure you use your specific identifiers, which most likely will be different from the ones shown here.
You need to first bind this USB device and then attach it to WSL by using two separate CLI commands. Perform a bind of your USB device using your identifier in a terminal window with administrator priviliges:
usbipd bind --busid 4-2
The bind command binds your USB device and makes it shareable to other devices, including your own machine and WSL. During the binding process nothing spectacular happens. The device will be shared and marked as having such state. You can inspect the results of the bind command by asking for the list again.
c:\> usbipd list
Connected:
BUSID  VID:PID    DEVICE                                                        STATE
3-5    045e:0855  USB Input Device, Microsoft Surface Thunderbolt(TM) 4 Dock    Not shared
4-2    0403:6001  USB Serial Converter                                          Shared
4-9    045e:0990  Surface Camera Front, Surface IR Camera Front                 Not shared
...
The next step will perform an attach of the shared device to the Windows Subsystem for Linux. During the attach procedure, the original USB device and its function will disappear from your list of devices. It is replaced with a new USB controller.
usbipd attach --wsl --busid 4-2
This command attaches to all WSL distributions you have installed. You can be more specific and target a single distribution. Your output in the terminal window might look similar to this:
usbipd: info: Using WSL distribution 'Ubuntu-22.04' to attach; the device will be available in all WSL 2 distributions.
usbipd: info: Using IP address 172.23.48.1 to reach the host.
At this point your USB device will disappear as the original device and appear as a USBIP Shared Device under USB Serial Bus Controllers.

You can also have usbipd automatically re-attach any devices that got disconnected by unplugging and reconnected by plugging in again. Specify the --auto-attach option when attaching the USB device.
After the second command the terminal window will be captured by the auto-attach and shows any attach and detach events of your device. Keep this terminal window open.
usbipd: info: Using WSL distribution 'Ubuntu-22.04' to attach; the device will be available in all WSL 2 distributions.
usbipd: info: Using IP address 172.23.48.1 to reach the host.
usbipd: info: Starting endless attach loop; press Ctrl+C to quit.
WSL Attached
Mapping a shared USB device to a container
The usbipd-win tool created a USBIP Shared Device with an IP address. This allow it to be shared with WSL, where it will appear as /dev/ttyUSB0, where the actual number might be different.
First check whether the device has been mapped correctly. Start a wsl session on your machine by opening a terminal window directly in WSL or by entering the wsl command. Inside the Linux shell, run the command lsusb to list all USB devices inside the Linux subsystem.
Hint
If your Linux distribution is missing the
usbutilspackage, you can add it to your container when you want to inspect USB devices withlsusb.sudo apt update sudo apt install usbutilswhere you might not need the
sudoif you are running as root or with sufficient priviliges
$ lsusb
Bus 002 Device 001: ID 1d6b:0003 Linux Foundation 3.0 root hub
Bus 001 Device 008: ID 0403:6001 Future Technology Devices International, Ltd FT232 Serial (UART) IC
Bus 001 Device 001: ID 1d6b:0002 Linux Foundation 2.0 root hub
The mapped device should appear in this list. If not, it could be that your Linux distribution does not include the necessary or correct version of the USP/IP drivers and database. In addition, you can list all devices that are mapped to your Linux environment:
$ ls /dev/tty*
/dev/tty    /dev/tty15  /dev/tty22  /dev/tty3   ...
/dev/tty0   /dev/tty16  /dev/tty23  /dev/tty30  ...
/dev/tty1   /dev/tty17  /dev/tty24  /dev/tty31  ...
/dev/tty10  /dev/tty18  /dev/tty25  /dev/ttyUSB0
/dev/tty11  /dev/tty19  /dev/tty26
...
Your device should appear as a mapped USB device in this list.
Since a container is isolated from its host, we need to mount the device during startup of the container. You can use the run arguments of the container to specify a specific device. The devcontainer.json configuration has a section for the run arguments of a container. You can add an additional argument for the device being attached to the container.
{
  "name": "cc65",
  // ...
  "runArgs": [
    "--env-file", ".devcontainer/devcontainer.env",
      // Attach USB device 0 from host to container
    "--device", "/dev/ttyUSB0:/dev/ttyUSB0",
    "--privileged"
  ],
  "mounts": [
    "type=bind,source=/dev/serial,target=/dev/serial"
  ]
}
You can also see that there is a mount of /dev/serial from WSL to the devcontainer.
Once your devcontainer has started, check whether the USB device has been exposed by running lsusb in a terminal session inside the container.
The output of the lsusb command will look similar to before, when you ran it inside a WSL session. Depending on the Linux distribution of your base image for the devcontainer, it might be using a different database. The bus and device identifiers will be the same with slightly different names and descriptions. If the device names are missing, you should install the usbutils package to get the better one.
$ lsusb
Bus 002 Device 001: ID 1d6b:0003 Linux 5.15.153.1-microsoft-standard-WSL2 vhci_hcd USB/IP Virtual Host Controller
Bus 001 Device 011: ID 0403:6001 FTDI FT232R USB UART
Bus 001 Device 001: ID 1d6b:0002 Linux 5.15.153.1-microsoft-standard-WSL2 vhci_hcd USB/IP Virtual Host Controller
The final step is to figure out the actual device name under /dev. Probably this will be /dev/ttyUSB0, but whenever you need to make sure or do not know, you can look at the symlink files under /dev/serial. The output of a list of files could be.
$ ls /dev/serial/by-id
usb-FTDI_FT232R_USB_UART_A402QLMV-if00-port0
The more elaborate way to find out is to go back to WSL and execute the following commands there:
find /sys/bus/usb/devices/usb*/ -name dev
The output should list a number of items, possibly like so:
/sys/bus/usb/devices/usb1/dev
/sys/bus/usb/devices/usb1/1-1/dev
/sys/bus/usb/devices/usb1/1-1/1-1:1.0/ttyUSB0/tty/ttyUSB0/dev
/sys/bus/usb/devices/usb2/dev
As you can see there is one entry that suggests to indicate an USB device. Use that full name to find out more using the udevadm tool.
You may have to install the package eudev for Alpine or udev for Ubuntu and Debian if it is not present in your container yet.
udevadm info -q property --export -p /sys/bus/usb/devices/usb1/1-1/1-1:1.0/ttyUSB0/tty/ttyUSB0
Make sure to replace the device name with your specific entry.
The output should be similar to this:
DEVNAME='/dev/ttyUSB0'
DEVPATH='/bus/usb/devices/usb1/1-1/1-1:1.0/ttyUSB0/tty/ttyUSB0'
MAJOR='188'
MINOR='0'
SUBSYSTEM='tty'
The DEVNAME value gives you the name for your USB UART device.
Troubleshooting
In rare occassions the device might not show up as a mapped device /dev/ttyUSB0 or similar.
Here are some troubleshooting tips:
-
Restart udev service
You can restart the service for devices by running the following command:sudo service udev restartAfterwards reattach the device to your WSL distros by running
usbipd detach --busid 4-2
usbipd attach --wsl --busid 4-2
replacing
busidargument with your bus ID. -
Validate attached serial device
You can check whether the serial device is still correctly attached. Whenls /dev/tty*does not list your device anymore, it probably will also miss the/dev/serial/folder. In Windows you can runwsl.exeand confirm the device is still mapped to WSL. It should list theserialand your device under/dev. Restart theudevservice as described about
Allowing access to serial port
Before you can use the serial port from a program or script, you need to give permission to the user or account that will use the port. The user must dialout permissions, which are given when part of the built-in dialout group.
If you are using devcontainers, the user inside the container is vscode. You can add this non-root user to the dialout group with this command:
sudo adduser vscode dialout
The user that was added to the dialout group will have to logon again to make the change effective.
You can also make the call to adduser part of a Dockerfile so it is effective before your container instance starts.
RUN adduser vscode dialout
Example usage
The Atari Lynx always uses a parity bit and has a single stop bit, as well as a specific baud rate and parity setting.
You can change the settings for your serial device with the stty command.
stty -F /dev/ttyUSB0 1000000 cs8 -cstopb parenb -parodd
This command will set the serial device /dev/ttyUSB0 to use:
- 1MBd baud rate:
1000000 - 1 stop bit:
-cstopb, indicating 1 instead of 2 - parity bit:
parenbto use bit - even parity:
-paroddmeans even parity instead of odd
Provided you are part of the dialout group you can execute this command without sudo.
With this setup you can use any program, script or command that uses your serial device. For example, you can try uploading a BLL object file to a running Lynx program that has an uploader routine active.
(echo -n -e "\x81\x50\x04\x00\xEF\xA3"; dd if=tutorial-hellobll.o bs=1 skip=10) > /dev/ttyUSB0
This command will send the required 6 bytes for the BLL upload header with the command P, start address (0x0400) and corresponding XORed length (0x105C), followed by the contents of the .o file after the first 10 bytes (which contain the BLL object header).
This approach is direct (and also fragile and error prone), but does demonstrate the use of the serial device. Typically you would use a script or program to provide a command-line interface, logic and error-checking.